
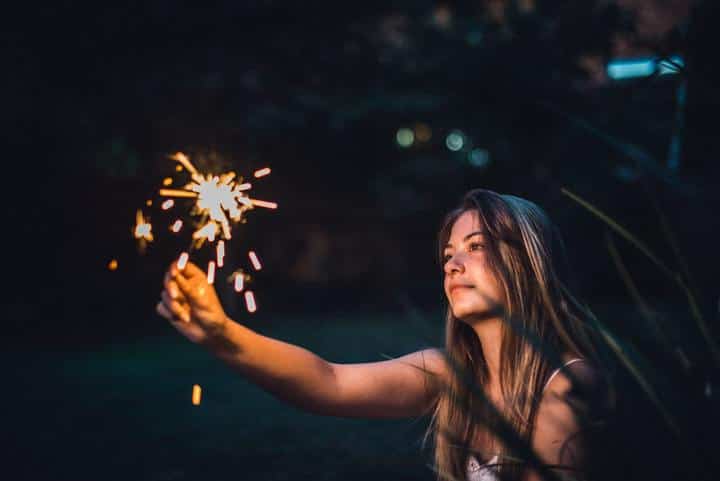
There was a time when photography was used to be only for experts. One would have to invest a lot to buy a camera, its accessories, and other stuff. Now with the invention of new camera phones, those things have been left behind. Keep reading if you wanna know about how to take professional pictures with phone.
Now simply take out your phone and take a shot that you can, later on, upload on your social media account or leave it as a memory. But that’s not so simple without properly knowing how to take pictures with a phone that can affect your photography. Photos may turn out to be lousy
Table of Contents
How to Take Professional With Phone
You can learn to take professional photos with phone by knowing different techniques and by practicing a lot. You can be in expert in mobile photography by practicing for a few hours a day.
Are you aware of the secret to take the best shots with your phone? If NO then you don’t have to worry because here in the blog we have provided some of the best tricks and hacks that can change your cell phone photography and move it to the next level.
How to Take Professional Pictures With Phone (Steps)
Here we will show you 15 amazing steps of how to take professional pictures with your phone.
1- Don’t Take a Photo Make It
If you want a perfect photo, then it won’t work for just a single one; means that you will have to take a lot of photos out of which you will find the perfect one. Some of the pictures will be okay but there will be one which will be great. For taking a perfect shot, you have to try your best and give it some time. With practice, you can overcome the time delay.
Some of the best photographers have fixed some specific timing of the day to take pictures. The reason is that they can have the light according to their need. Apart from that many professional photographers take time to take a perfect shot. It can take minutes to make a perfect snap.
2- Scan the Area to Find Any Distractions
Before taking pictures you must be sure that there are no distractions for you. You have to look around to find any distraction. Distraction can be anything; it can be certain objects, light intensity wrong angle, etc. You can adjust the angle to overcome the distraction
3- Define the Subject
While taking pictures you should not stick to just one idea. You have to try different ideas and poses so you can get a better shot. You can then compare the pictures and choose your ideal framing idea. My favorite framing ideas are macro-shots, medium shots, and torch shots. You can take pics with these frames and then you will see the varying of ideas.
Not every time you will get the chance to prepare yourself and plan for photos. You will learn by practice and you will be able to make ideas quickly. Apart from this if you are on a trip then you should take pictures with different angles and light intensity to take a perfect shot. If you are at a function then you need to be prepared. You can get new creative ideas from Instagram, Facebook, or Pinterest.
4- Where Does Your Eye go First?
When you first have a look at a photo, where do your eyes go first? Generally, your eyes first strike at the center of the photo. Whenever there is something bright or something is wrong it may be a distraction. Observe how your eyes stream as you take a look at the scene for your shot. This tip will enable the watcher to comprehend your picture.
5- Rule of Thirds
The rule of thirds is known to be the most basic rule to learn photography. By using the Third’s rule, you can change the whole idea of your photography and you can take stunning and brilliant pictures.
The initial step is to separate the picture into thirds in a horizontal way. Where do the even lines lie? Is it true that they are on the top third, center, or base? It is all the more satisfying if the lines avoid the middle and are either on the top of the base third and the main area comes at the center on the grid.
Suppose that you are taking a shot at the time of sunset, then be sure that lines are on either the base or top third of the picture. By taking the picture of the skyline the inside, at that point, the picture may look level. Have a go at shooting from left to right to ensure the subject is in the correct third or the left third.
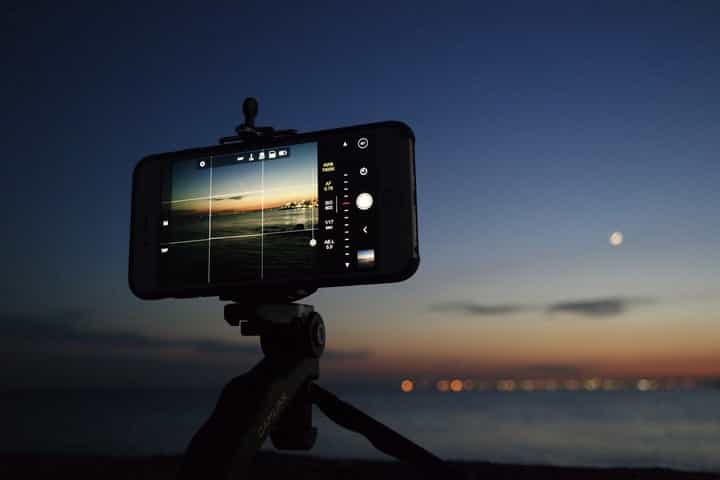
If you want to improve your photography skills then you should work on the rule of thirds. Do this by turning on the grid in the camera settings on your cellphone. The grid framework highlight will show black outlines as you snap a photo so you can situate your shot. When you set the matrix lines it will remain on until you turn it off.
When you take a look at a landscape, you will see that the rid lines will lead you through away in the picture. When taking a look at pictures we normally start at the focal point or we can say at the center of the picture. At that point, we take a gander at the other piece of the shot. The picture structure is there to give us were to look straight away and how to get importance out of the shot.
This is just a simple and basic technique that you can master easily. Our eyes follow lines because of the clearness and quality they make. They use of new ideas and new techniques can lead to a perfect snapshot. Lines can lead you straight heading through a road or it can lead us in a twisting way and bring us to a waterfall. It’s up to you how you master it.
Catching these lines in a picture will lead you to pick up the significance of the story. Grid Lines can control you all through the story without being available. Mastering the grid lines is the main technique which is the base of the rule of thirds.
To show more perfection in the perspective of the picture, take a closer look at the main lines. Its importance is that these lines should complement the subject and bring the watcher into what the subject is doing. A genuine case of this is snapping a photo of somebody standing at the end of a long straight hallway.

5- Stabilize your Shot
Most of the new smartphone cameras software for example Google Camera or iPhone camera avail the technique of image stabilization and image optimization. These features greatly improve the image quality but it doesn’t work well if you shake the phone while taking pictures. As a result, images will be blurred. Taking pictures while holding the phone with one hand results in slight motion which causes the photos to be blurry.
In smartphones, there is a feature of taking photos by clicking the side volume buttons. This is a great improvement which helps in taking pictures with one hand and as a result images are clear and clean.
6- Simplify the Background
The most important thing which affects photography is the background. A professional photographer keeps check on everything and assures that everything is in place. If the background is not worth a perfect shot then no matter how much you try you can’t get a perfect pic. You can change the angle to get rid of that distraction.
7- Shoot from Different Perspectives
If you are to draw scenery, it is difficult to make depth or be realistic, yet by changing angles it can make pictures that have profundity. Changing camera angles can make interesting stories. Take pictures at eye level yet change the point of your cell phone. This will create new ideas in your professional skills.
8- Shoot at 90% Angle
If you are taking pictures of something from above then make sure that you take the shot at 90-degrees. If you taking a photo of a cup or glass from the upper side then the center of your phone should be parallel to the surface so that the cup shape is kept as a perfect circle.

9- Low Angle Photography
Understanding where the skyline line in a drawing can assist you in making better work of art. It is some sort of tool that you can use in your photography. At the point when you use low edges or angles in photography the horizontal line is on the base of the picture. This draws out the topic and it fills the edge in a more inventive manner.
Low edge photography can show objects being bigger to scale than they are. You can make a feeling of amazement or power to make proficient pictures with a cellphone camera. Using edges can likewise be an incredible method to show a feeling of scale when making a scene. Including people, animals or other things can show the size of an immense mountain.

10- Adjust the Exposure
How would you balance exposure in a pic? At the point when you snap a photo with your smartphone, it sets the exposure, which is the measure of light that is in the scene. The camera can misunderstand the presentation if the scene is exceptionally dim or brilliant. Tap on various points on your smartphone screen to change the lighting.
To figure out how to take proficient pictures with your smartphone, exposure is very significant. At the point when you snap a photo, presentation is the measure of light that is gathered by the sensor in your camera. It is the best approach to control the exposure and darkness of the picture.
Conventional SLR cameras have a light meter that mentions to them automatically about setting the exposure. A cellphone can change and auto-adjust the focus and exposure of the surrounding. You can do this by taping any point on the screen and a little circle or square will come up. This will adjust the exposure and focus on that area of which you are taking a photo. Getting the correct exposure in cellphone photography can be hard but this difficulty can be overcome by practicing.
Investigate each cell phone contact screen by tapping anywhere to modify and adjust the exposure and contrast. By tapping on a dim or dark portion, the picture will get more exposure and will be brighter. Tap on a light part and the shot will get darker. Try to locate the correct spot where your phone will have lights and darks balanced. There should be no blinding lights and dark masses in your picture.

11- Focus
You can focus on a specific area of your screen by taping but nowadays because of modern technology there is no need for taping. The camera automatically adjusts focus and exposure. But if you are to take a macro shot then you need to tap on the object so that the object becomes clear. The spot where you tapped will be the most in focus and most probably it will blur the background making the photo classic. Thus the smartphone camera does a great job of adjusting focus and exposure.
12- Use Natural Light
At first, you have to focus on the exposure of the light. Is it excessively dull or splendid? A snappy tip for inside photography is to utilize the natural light from a window. Snap a photo of a person standing so the light hits him/her evenly. You can adjust the light by moving the slider on the side or bottom But be careful if you take a photo and you are exposed to an intense light then the photo will become dark.
Try for a picture of the sun or light and slide your finger up or aside along the slider. When taking a close picture shadow can mess with your pics. Thus that the picture has numerous messing shadows, you can stand in the sun to diminish the glare regarding the object or person. Taking pictures at dawn or nightfall is the best time and an ideal opportunity to get great lighting and perfect photos.

13- Use The Flash Sparingly for Mobile Photography
Generally, it is not the best idea to keep the flash on auto. All you need is to keep it off and turn it on specifically when you need it. Thus the auto-flash will not mess with your ideas and photos. You can use flash if you need low light photography if the light is not appropriate for taking photos or if you want to focus on a particular object. In today’s world cameras offer night mode features which will provide you with the best clicks even at dim light conditions.
14- Use the Flash in Daylight as a Fill-in Flash
Yup, it’s right; you can use the flash for daylight photography. On a bright sunny day, your subject/object may have shadows, so the flash will help lighten up the image. The ambient light around the object and noise in the picture will be reduced to a huge extent by turning on the flash.

15- Explore Add on Lenses
There is good news for mobile photographers. The good news is that now add-on lenses are available for almost every phone which can greatly improve smartphone photography. There is a company named Olloclip which has been making lenses for Apple for many years. This company has now launched a lens that can be attached to almost every phone. Therefore most of the cellphone photographers are trying their best to get hands-on these add-on lenses.
With the help of lenses, it has become easier to take an awesome wide-angle shot, amazing macro shots, and telephoto shots. These lenses can be attached to phones easily via clip. And more importantly, the lenses work effectively with all camera apps and allow the user to take fantastic panorama shots or to create videos either simple, slow motion or time-lapse.
So! That was the detailed list of steps showing you how to take professional photos with your cellphone.
Conclusion
Here in this blog we showed you 15 amazing steps on how to take professional pictures with your phone which actually work. If we helped you, tell us in comments and also share our post with your friends. Thanks for Reading!
Also Visit: 8 Best Cheap Lenses for Canon

If some one needs expert view about blogging then i advise him/her to go to see this webpage,
Keep up the pleasant work.
Article writing is also a excitement, if
you know after that you can write otherwise it is complicated to write.
you’re really a excellent webmaster. The website loading pace
is incredible. It kind of feels that you are doing any distinctive trick.
Moreover, The contents are masterwork. you’ve performed
a magnificent process in this matter!
What i do not understood is in reality how you’re now not really much more
well-preferred than you may be now. You’re so intelligent.
You already know therefore considerably on the subject
of this subject, produced me personally believe it from so many numerous angles.
Its like women and men aren’t involved except it
is one thing to do with Lady gaga! Your personal stuffs excellent.
At all times maintain it up!